If you have a broken printer ribbon, you aren’t alone. This is a common problem that people who operate ID card printers have. Fortunately, repairing a broken printer ribbon does not require advanced technical know-how or any other kind of special skillset. It is something anyone can do. See our steps below.
 Step 1: Getting To The Broken Printer Ribbon
If your printer ribbon has broken, first you need to pause the current print job immediately if jobs are pending in your printer queue. Deleting them is not necessary. Next, turn off your printer, open it up and unlatch the print head.
Step 2: Removing It
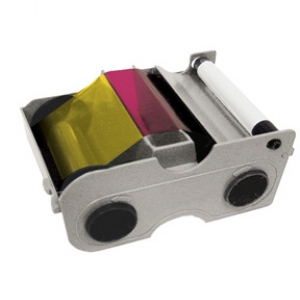
Next you need to remove the ribbon cartridge or supply on the right side and then on the left side you need to take-up spools. When taking out the spools, it is crucial you know which spool is which. Then you should take the ribbon out from the platen roller. If the ribbon is stuck onto the card, you need to take the extra ribbon out the card path’s way. At this point, there should no longer be any cards or ribbon in the printer’s card path.
Step 3: Repairing
For our third step, find a flat surface for your cartridge. Make sure it is clean first. Then, find the two ends for the take-up and supply spools. You also want to make sure the two ends are straight as possible, so it’s best to cut away any excess ribbon.
Now you are ready to start the repairs. Pull the tape at each until they overlap. Then all you need to do is tape them together with scotch tape. It really is that simple! If you find that there is a bit of used ribbon on the take-up, taping directly over the used ribbon won’t cause any problems.
Step 4: Restarting Your Job
It’s finally time for you to get back to your print job. Put your printer ribbon back inside the printer and don’t worry about the colour position. The printer can automatically put the ribbon in the right position after you have inserted it. Then, close the printer properly by latching the printhead down and shutting the cover. Turn the printer back on and everything should be good to go. Your job should restart automatically.
If your printer ribbon continues to break, you might have an issue with the printer itself or the cards rather than just the ribbon. Here are the common steps you can take to fix it:
Restore Driver Settings
Sometimes if the default settings have been changed, the ribbon can get too hot and this can lead to them breaking. Restoring the print driver to its original settings can do the trick.
Examine Blank Cards for any Kind of Debris
Sometimes, when pre-punching your cards before you print them, debris can enter the punch whole and tear the ribbon. In general, it’s best to print over your cards and then punch them.
Don’t Print Too Close to the Card’s Edge
If you print on the edge of your card with a direct-to-card printer, the ribbon can snap. The way to avoid this is to modify the unprinted border on your ID card software.
Clean Your Printer
Using a cleaning set designed for your model, you can clean your printer to help prevent printer ribbons from breaking. You also need to recalibrate the ribbon sensor afterwards.
To learn more about how to repair a broken printer ribbon, contact us at Avon Security Products today!